Right folks, here we have the definitive hacking thread, as the official Wiki is a bit confusing.
http://buffalo.nas-central.org/wiki/Main_PageThe model that is on offer on ebay at the moment is a HS-DH500GL
Well start with upgrading the HDD.
DissasemblyThis should take the average tekker no more than 5 minutes. I didnt even know there was a guide at first as its that straight forward.
Once you have your HDD in, prepare the PC.
Youll need the following files:
Firmware :
http://www.buffalo-technology.com/support/getfile/?HS-DHGL_211_101b.zip
WebAccess with upload function, MediaServer PS3 issue fixed, beta version
TFTP :
ftp://24.153.165.234/disk1/share/nas-recovery/TFTP%20Boot%20Recovery%20HS-DHGL%202.10.exe
Earplugs are optional, as the drive likes to get a bit vocal that its having identity issues.
Performing the TFTP boot: 1. Directly connect your NAS to your computer via an Ethernet cable (crossover isnt necessary)
2. Set your computers NIC (Network Interface Card) to a static IP address of 192.168.11.1
3. Run the TFTP program for your respective NAS and have the files extracted to your desktop
4. Open the TFTP folder and run the program TFTP Boot.exe with the icon: TFTP program icon

5. Boot the device.
6. A command prompt similar to the one shown below should appear:
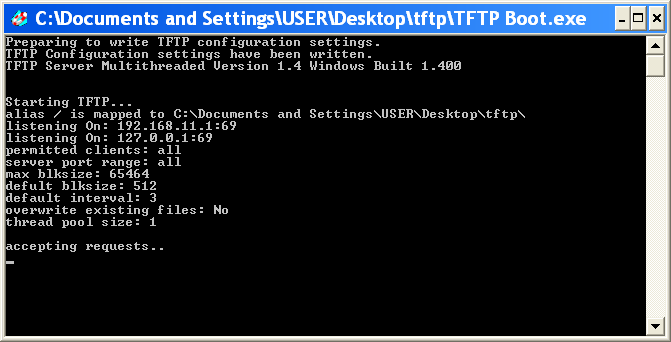
7. When the NAS boots up it will make a request to the IP address 192.168.11.1 (which is what your computer should be set at) and the terminal should look something like this:
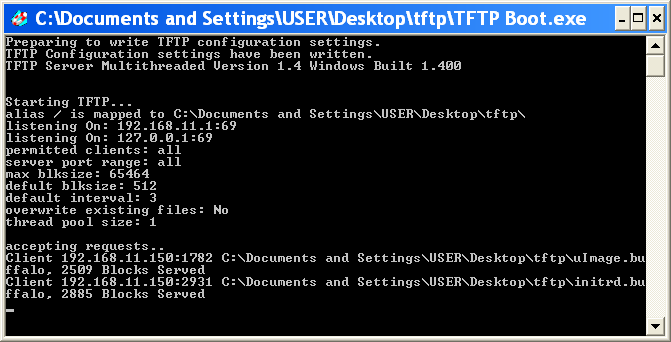
8. If it doesnt show the blocks served, try the process again. Some user have reported that after the device shows the error, holding the function button down for 5 seconds can provoke the TFTP requests.
After you see blocks of data being served the NAS typically boots to Emergency Mode at which point you can perform a firmware update.
The firmware file above has an executable file in it, run this and it will partition and format your HDD for you.
It might take anywhere up to 2 minutes for the firmware updater to see the NAS.
If it shows up in the included NasNavigator*, the firmware updater should see it also.
* Latest version:
http://www.buffalotech.com/support/getfile/nasnavi-224_win.zipMore than likely when you connect it back to the PC, the web console is in Japanese.
Just click around until you see it. Im not sure what the actual location will be (whoever gets their drive first, post the location of the language settings.)
Ive done this on a LS-GL, which is essentially the same hardware as the Live, and it went without a hitch.
Pack Contents


